Tuesday, June 22, 2010
Buffalo Sabres NHL Defense Drill
This drill focuses on defenssive zone coverage and backchecking. The drill starts with a 1 on 1 battle in front of the net ( F1 vs. D1). F1 is looking for a pass from D2 who has a puck behind the net. D2 makes as many passes as possible to F1 before the whistle blows. On the whistle, D2 caries a puck around the net and makes a breakout pass to F2. F2 and D1 then attack D3. F1 backchecks making it a 2 on 2 situation. Once the play is made, D3 becomes the player behind the net making passes to F2 in front of the net until the whistle blows. F2 then becomes the backchecking forward as D3 passes to F3. F3 and D3 then attack the other direction. The sequence continues back and forth.
Sunday, June 20, 2010
Hockey Breakout Drill
Standard Hockey Breakout
There are tons of different breakout patterns and systems your team can use to quickly and safely move the puck out of your own end. Unfortunately our team doesn't practice, so we tend to keep things pretty simple on the ice. Typically we just use the standard breakout.Every player should be aware of the standard breakout regardless of the position you play. Defense, Centre and Wing all play a role.
Here is How the Standard Breakout Works:
- The defenseman has the puck behind his own net, and sees a winger open along the boards.
- He passes the puck to the winger or rings it around the boards.
- Meanwhile the Centre comes back into his own end from the blueline, turns, and curls up ice making himself available for a pass from the winger.
- The winger can then either pass is to the centre, or chip it up the boards and out of the zone.
The Centre
The key to this play is timing. The centre should be passing by the winger as the winger receives the puck. The winger can then make a short, quick pass to the centre, who now has some speed, and is able to take the puck out of your own end.
The Winger
The winger must be ready for any type of pass from the defenceman. It's rarely going to be right on your stick. If the puck has been flung along the boards into the corner, it can be tricky.Here's a variation where Chicago's Left D-Man (Keith #2) passes the puck behind the goal line to the Right D (Seabrook #7), who then quickly moves the puck up to the winger (Havlat #24), who then passes it to the centre (Toews #19.) Toews has just completed his U-turn from deep in his own end.
The best way to control this type of pass is to line up facing the high slot with your butt against the boards, stick on the ice, and the heel of your front foot (the foot closest to the blueline) right against the boards. If you tilt your front foot outwards at an angle, and keep your stick in front of you, the puck should bounce off your skate blade towards your stick as it comes in behind your trailing leg.
The puck can take a weird bounce at any time, so this method doesn't always work perfectly. Even if the puck gets caught up between your skates, you still have a good chance of getting it under control.
The worst way to receive this type of pass is to face the boards and try to use only your stick to stop the puck. If the puck is coming fast and hops over your stick, it will go right to the opposing defenceman. A deadly giveaway.
This is a great play as it gives the centre two chances to receive a breakout pass. First from the Defenceman, then a second opportunity from the winger. It also leads to a goal!
Thursday, June 17, 2010
Hockey Slapshot tips for Hockey
Slap Shot
| | |
| Slap Shot | Slap Shot One Timer |
The slap shot is the most powerful and exciting shot in hockey. However, most of the time, the slap shot ends up hitting the boards. If you are to use the slap shot, you need to develop accuracy.
SLAP SHOT - One of the most effective slap shot is the low slap shot. Try to keep the slap shot a few inches from the ice. At that height, your teammates have a good chance of deflecting the puck in the net and the goalie is easily screened by his own defenceman. The low slap shot is a great weapon especially when used at the point by a defenceman.

With your eye on your target, draw your stick back between your waist and your shoulder height. In this wind up (slingshot) position, your weight should be on your back leg. Drive your stick down stepping and leaning into the shot transferring your weight forward onto your stick through your lower hand. Your stick should strike the shooting surface 2 to 3 inches before the puck. The contact with the puck should be made in the middle of the blade or a bit off centered toward the heel. The bending and whipping return of the shaft and the forward motion of the downswing is what creates the powerful force. As the puck rises off the shooting surface, snap your wrists. Continue with a low follow through pointing at the target and resume a balanced position with your weight fully transferred on your front leg.
For the short wind up slap shot the stick is drawn back at hip level. The short slap shot wind up should be used when there is little time to make a shot that requires power.
Monday, June 14, 2010
How to take a hockey snap shot
Snap Shot

Side to Front Snap Shot | Within 15 to 20 feet from the net, an accurate snap shot is the ultimate shooting weapon. This shot has the quickest shot release with plenty of power. Mastering the snap shot is difficult and takes a lot of practice but it is well worth learning. The benefit is being able to shoot a powerful shot with almost no wind-up and no warning. |
Back to Front Snap Shot | One Timer Snap Shot |
The snap shot is quicker than a wrist shot and more accurate than a slap shot.The most important attribute of a good snap shot is the speed with which youcan release the puck. It’s probably the most widely used shot in hockey today.
SNAP SHOT - One of the most effective snap shot is the low snap shot. Try to keep the slap shot a few inches from the ice. At that height, your teammates have a good chance of deflecting the puck in the net and the goalie is easily screened by his own defenceman. The low snap shot is a great weapon especially when used at the point by a defenceman.
With your eye on your target, draw your stick back between your waist and your shoulder height. In this wind up (slingshot) position, your weight should be on your back leg. Drive your stick down stepping and leaning into the shot transferring your weight forward onto your stick through your lower hand. Your stick should strike the shooting surface 2 to 3 inches before the puck. The contact with the puck should be made in the middle of the blade or a bit off centered toward the heel. The bending and whipping return of the shaft and the forward motion of the downswing is what creates the powerful force. As the puck rises off the shooting surface, snap your wrists. Continue with a low follow through pointing at the target and resume a balanced position with your weight fully transferred on your front leg.
Wrist Shot for Hockey
| The wrist shot is probably the most effective shot in hockey. It is the most accurate shot and it can be released fairly quickly. This is the shot that a player should learn first. While not as fast as the slap shot, with practice, proper technique and upper body strength, the wrist shot can be a very powerful shot. |
WRIST SHOT - Use the proper stick grip and take on the proper hockey stance. For the wrist shot, move your lower hand halfway down the shaft to add power to the shot. Position your body at a 45-degree angle to the net. Bring the puck behind or even with your back leg lowering your shoulder as you reach back and down with your stick to position the puck. Keep the puck in the middle of the blade with the blade tilted over the puck (rotate your wrists). In this position, your weight should be on your back leg.

Sweep the puck forward while transferring your weight toward your front foot and rotating your body forward. As the stick blade crosses your body, transfer body weight on your stick while pushing forward with your lower hand and pulling backward with your top hand. The puck is released when it reaches your front foot and your shoulders are square to the net. At the point of release, your wrists turn causing the stick blade to turn out and lift the puck. After the puck is released, follow through pointing the toe of your stick toward the target. The height of the shot depends on how much you rotate your wrists and how high your follow-through is.
The short wind up wrist shot is similar to the description above except that the puck is positioned between your back leg and front leg. Starting with your weight on your back leg, you step directly into the shot transferring body weight on your stick while pushing forward with your lower hand and pulling backward with your top hand. The short wind up has a quicker release and should be used when there is little time to prepare and power is not necessarily required.
For the wrist shot advanced shooters will position the puck on the back third of the blade. When the shot is released, the puck rolls toward the toe of the blade causing a spin on the puck, which provides a faster and more accurate shot.
Thursday, June 3, 2010
How to take a good wrist shot
How to Take a Wrist shot
 For another great in depth article on the wrist shot check out this how to take a wrist shot article
The wristshot is one of the most commonly used shot in hockey, this means that it is critical for any one who is serious about hockey to perfect their wrist shots. When learning to take a wrist shot there are 3 things you need to work on
You need to work on your wrist shot power / speed because as you get better at hockey, so do the goalies. The slower your shot is the more time the goalie has to react and stop you. This is why it is important to work on your wristshot powerThe accuracy of your shot is very important, in fact accuracy is more important than power (but having both is a lethal combination) If you look at the net, and you see the goalie has left a 4 inch by 4 inch opening, and you can shoot the puck right into that opening, you will be able to score a lot more goals. Practice your accuracy first so you can shoot out the corners when you need to. Once you can snipe the corners, then practice building your wrist shot power
The last thing you need for a perfect wrist shot is how fast you can get the shot off. Some players take a long time to set up their shot, they pull the puck back, break their stride, look for a spot to shoot and then shoot. All of this preparation gives the goalie a lot of time to set up and predict where you are going to shoot. Practice coming in at full speed and shooting without breaking your stride.
An unpredictable release, coupled with deadly accuracy and blistering speed will guarantee you a tonne of goals in hockey.
The wristshot is one of the most commonly used shot in hockey, this means that it is critical for any one who is serious about hockey to perfect their wrist shots. When learning to take a wrist shot there are 3 things you need to work on
- Wristshot power / speed
- Wristshot accuracy
- Wristshot release time
You need to work on your wrist shot power / speed because as you get better at hockey, so do the goalies. The slower your shot is the more time the goalie has to react and stop you. This is why it is important to work on your wristshot powerThe accuracy of your shot is very important, in fact accuracy is more important than power (but having both is a lethal combination) If you look at the net, and you see the goalie has left a 4 inch by 4 inch opening, and you can shoot the puck right into that opening, you will be able to score a lot more goals. Practice your accuracy first so you can shoot out the corners when you need to. Once you can snipe the corners, then practice building your wrist shot power
The last thing you need for a perfect wrist shot is how fast you can get the shot off. Some players take a long time to set up their shot, they pull the puck back, break their stride, look for a spot to shoot and then shoot. All of this preparation gives the goalie a lot of time to set up and predict where you are going to shoot. Practice coming in at full speed and shooting without breaking your stride.
An unpredictable release, coupled with deadly accuracy and blistering speed will guarantee you a tonne of goals in hockey.
Monday, May 31, 2010
Green Biscuit Puck Review
This is a post by Jeremy Rupke who has his own hockey tips blog. You can visit his page if you want to buy the Green Biscuit and you can also read his full Green Biscuit Review (and see the cool pictures and videos!)
This is a review of the Green Biscuit training puck. The GB is designed to slide smoothly without flipping over, just like a regular hockey puck does on the ice. The problem with most off ice pucks is they do not slide smoothly, most off ice pucks will flip over due to vibrations and friction.
Design
The unique design of the Green Biscuit reduces vibration which helps stop the puck from flipping over when sliding, and during stickhandling. The next issue that needed to be addressed was friction that would reduce the distant a puck can slide. The GB uses a special type of plastic, and also a unique design to reduce contact points, allowing it to slide much further than most off ice pucks.
Size and Weight
The biscuit is made to be the exact same size as a regular hockey puck, however it is not the exact weight of a hockey puck. Hockey pucks weigh between 5.5 oz and 6 oz but the Green Biscuit only weighs 4.4 oz. The reason that it was made light is because of friction. The added friction of rough surfaces makes off ice pucks feel heavier, so in order to closely match the feel of stickhandling on ice the GB was made a bit lighter
Stickhandling
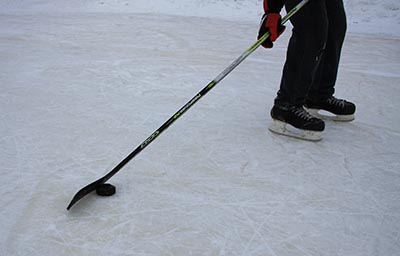
We took the Green Biscuit out to an outdoor hockey rink and tested a lot of different moves. We did normal stickhandling, quick dekes, toe drags and some fancy moves as well, we were able to perform all of these moves just as we would on the ice with a normal puck
Passing
We tested quick passes, hard passes, one touch passes, backhand passes, and even saucer passes! We were really impressed with how the GB held up, you can see our Green Biscuit video to see what I am talking about
Overall Thoughts We were really impressed with the Green Biscuit. We loved how easily (and how far) it slid on the pavement and really loved stickhandling and passing. The great thing is that we were able to perform all of the dekes and passes that we normal do with a puck on the ice, off the ice.
This is a review of the Green Biscuit training puck. The GB is designed to slide smoothly without flipping over, just like a regular hockey puck does on the ice. The problem with most off ice pucks is they do not slide smoothly, most off ice pucks will flip over due to vibrations and friction.
Design
The unique design of the Green Biscuit reduces vibration which helps stop the puck from flipping over when sliding, and during stickhandling. The next issue that needed to be addressed was friction that would reduce the distant a puck can slide. The GB uses a special type of plastic, and also a unique design to reduce contact points, allowing it to slide much further than most off ice pucks.
Size and Weight
The biscuit is made to be the exact same size as a regular hockey puck, however it is not the exact weight of a hockey puck. Hockey pucks weigh between 5.5 oz and 6 oz but the Green Biscuit only weighs 4.4 oz. The reason that it was made light is because of friction. The added friction of rough surfaces makes off ice pucks feel heavier, so in order to closely match the feel of stickhandling on ice the GB was made a bit lighter
Stickhandling
We took the Green Biscuit out to an outdoor hockey rink and tested a lot of different moves. We did normal stickhandling, quick dekes, toe drags and some fancy moves as well, we were able to perform all of these moves just as we would on the ice with a normal puck
Passing
We tested quick passes, hard passes, one touch passes, backhand passes, and even saucer passes! We were really impressed with how the GB held up, you can see our Green Biscuit video to see what I am talking about
Overall Thoughts We were really impressed with the Green Biscuit. We loved how easily (and how far) it slid on the pavement and really loved stickhandling and passing. The great thing is that we were able to perform all of the dekes and passes that we normal do with a puck on the ice, off the ice.
Subscribe to:
Posts (Atom)